'w strand Eye Splice'
Three Strand Eye Splice(both standard & tapered)Step #1 â€" Beginning the Splice
Measure 14 crowns (or twists) from the end of the line [18 crowns for a tapered splice].
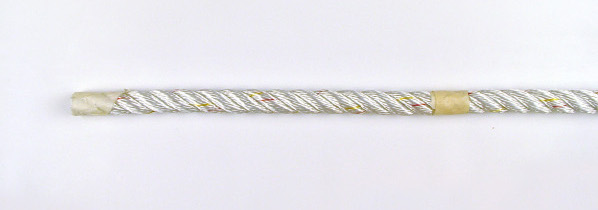
Un-lay the rope up to the tape. Heat seal or tape the end of each individual working strands. (note: be careful that the strands do not untwist) Step #2 Forming the eyeBend the rope to form the desired eye size and mark with a temporary wrap of tape. This is done with the standing part of the rope in front of you, bending the tail of the rope from left to right. (note: bend following the natural bend of the rope so as not to put any twist into the eye or the splice.) 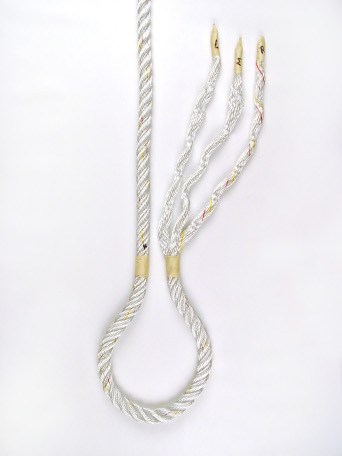
Step #3 The First Set of Tucks
Lay the strands out such that you have a left, middle, and right working strand. Then place the left and
middle working strands across the rope just below the taped mark.
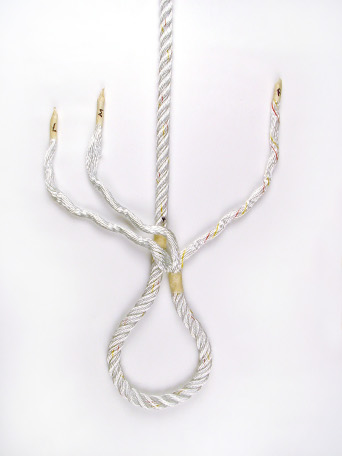
Tuck the middle strand under a strand on the standing part of the rope just beyond the taped mark. (note: if this is your first time splicing, mark the strand you tucked under as this will be your reference point.) Take the left strand and tuck it under the strand just to the left of the one you raised on the previous step. (note: the left strand should look like it is going over the strand you raised in the previous step) 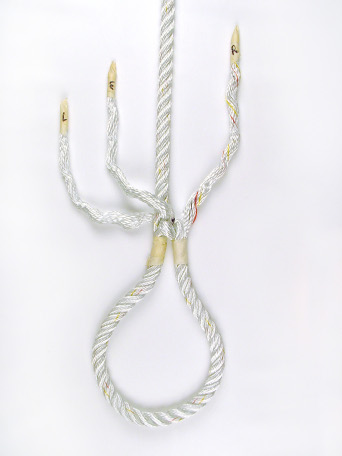
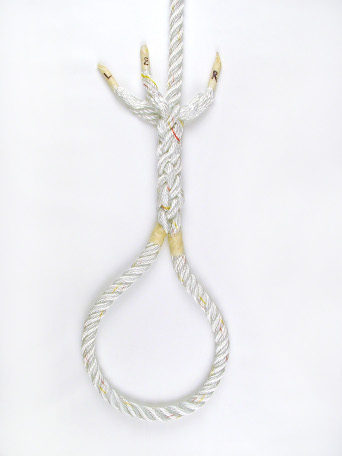
Take the right strand and tuck it under the strand just to the right of the one you raised for tucking the middle strand. (Note: It is easier to do this if you first turn the rope over, as shown in photo) 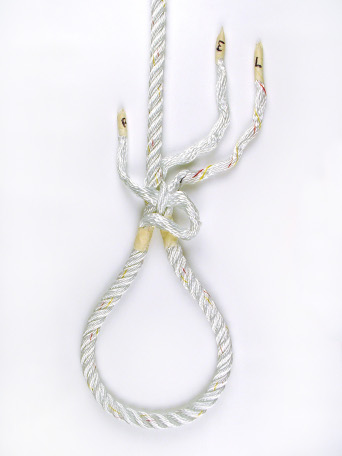
Pull all three working strands snug
(note: the two temporary tape marks should be aligning and forming your eye.)
Step #4 Additional tucks
Perform four more sets of tucks for each of the three working strands. In each tuck the working strand
should go over a strand then tucked under a strand.
Step #5 Tapered SpliceIf performing a standard splice skip this next step / go to step #6 Finishing the Splice:If you are making a tapered splice make two additional tucks with one strand and one additional tuck with a second strand, leaving the third strand as is. 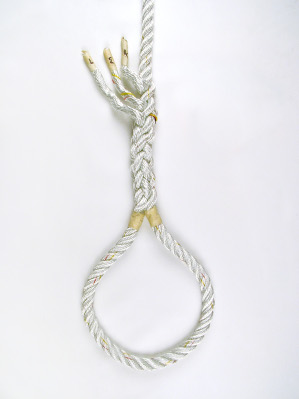
Step #6 Finishing the spliceCut and melt the ends of the working strands, leaving a stub approximately as long as the diameter of the working strand. (Note: the stub will be drawn into the rope once it is loaded up.) 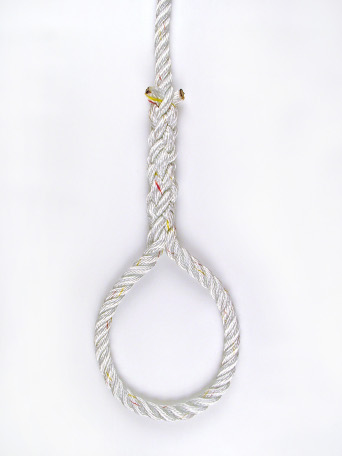
|
NOTICE: Some pages have affiliate links to Amazon. As an Amazon Associate, I earn from qualifying purchases. Please read website Cookie, Privacy, and Disclamers by clicking HERE. To contact me click HERE. For my YouTube page click HERE